 ZIPTEAMS × GOOGLE TAG MANAGER
Install Zipteams Meeting Widget on your website and landing pages using GTM
Zipteams helps you quickly connect with high-intent website visitors over an instant video call.

This reduces your time-to-demo from an average of 3 days down to just 20 seconds!

Total setup time via GTM: < 5 mins
If you’re new to GTM or want to brush up on your knowledge, refer
this
.
Set up Zipteams
1Sign up on
Zipteams
.
2Navigate to
“Setup”
->
“Setup Meeting Widget”
->
“Instant Meeting Setup”
. Click on
“Configure”
.
3Adjust the look and feel of the widget as per your website theme in the
“Widget Look”
section.
4Configure the behaviour of the widget in “
Widget Control”
. Make a
note of the highlighted tag
in the
“Tags for user allocation”
.
By default, this tag should be
“instant-meetings”
. You would need to allocate the same tag to members of your team who shall be active for taking instant video calls.
5.
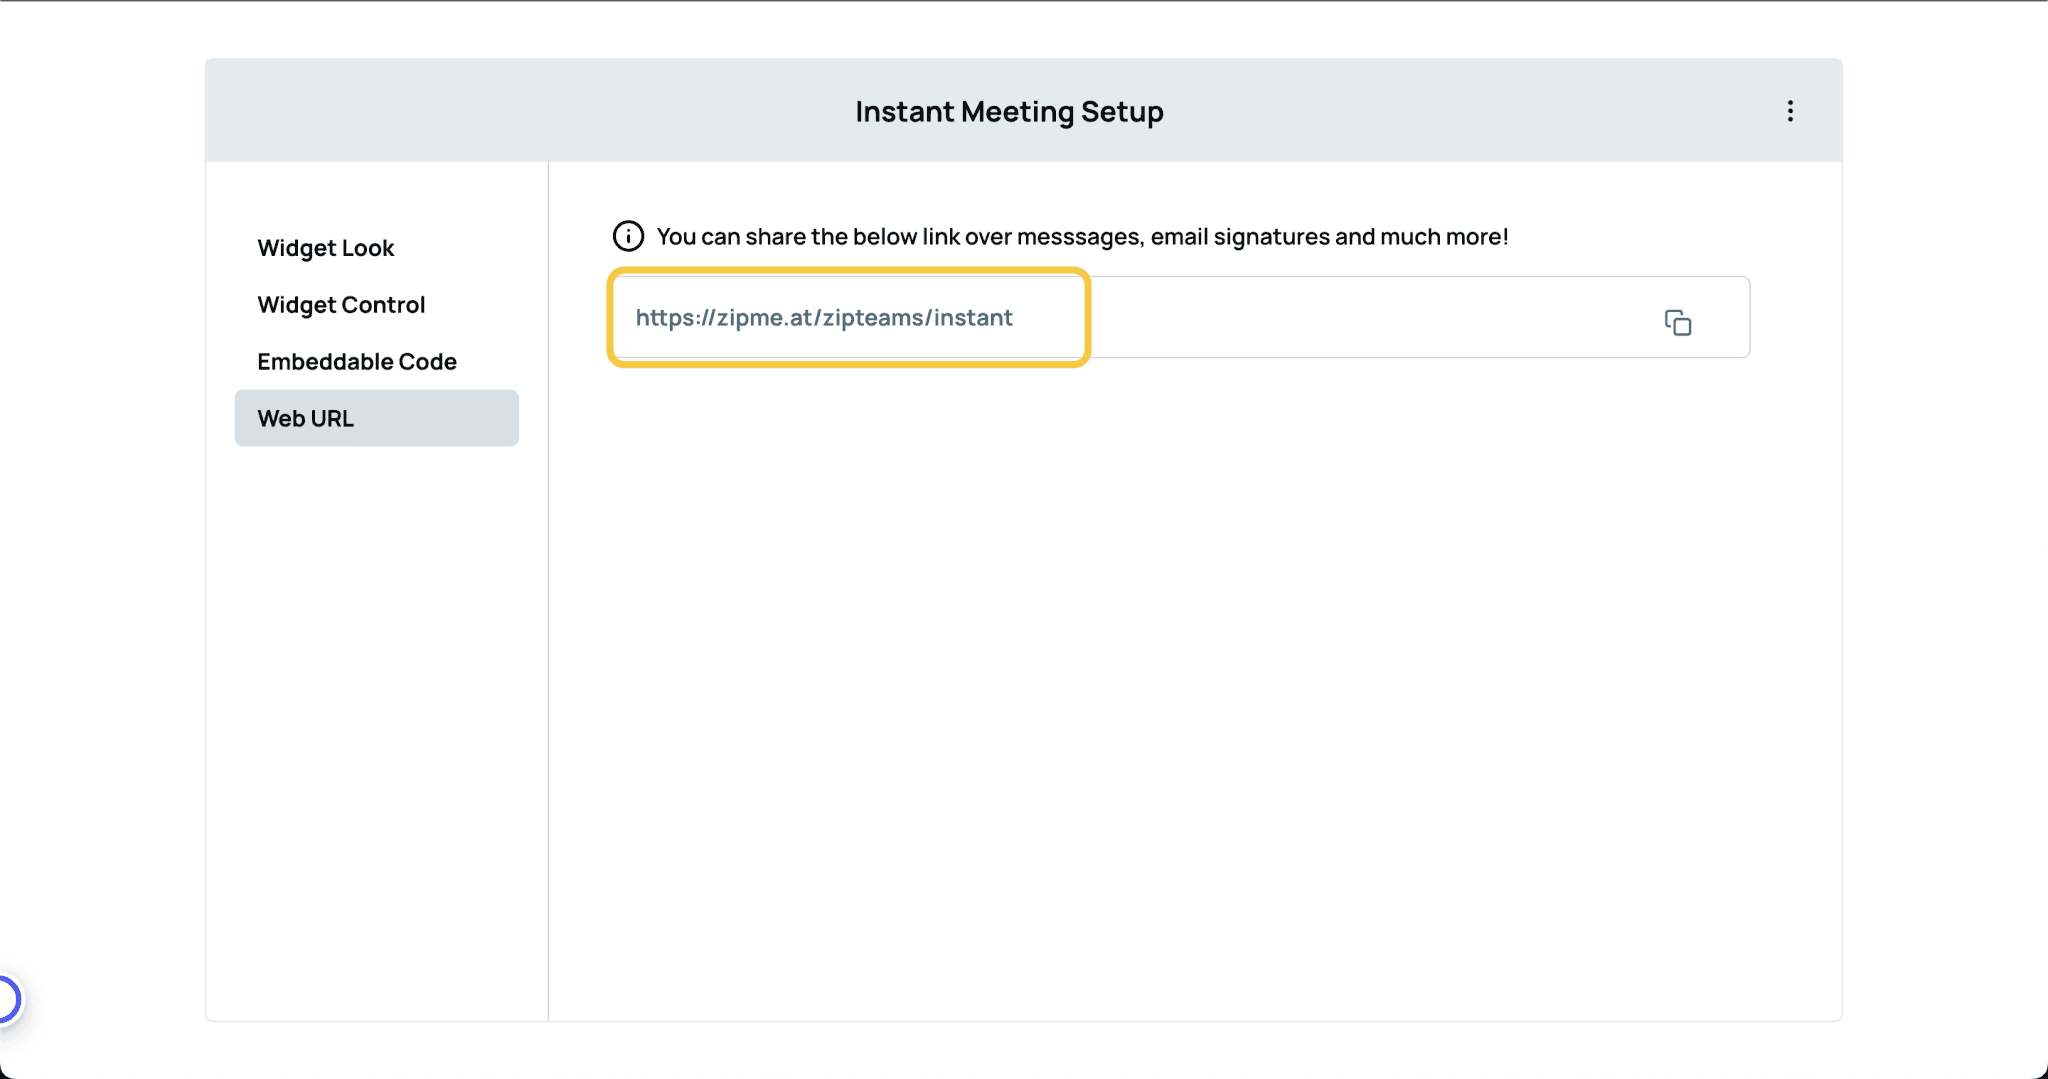
Make a note of the meeting URL
created for your workspace in the
“Web URL”
section. This will be required to configure the GTM Tag.
6Navigate to
“Setup”
->
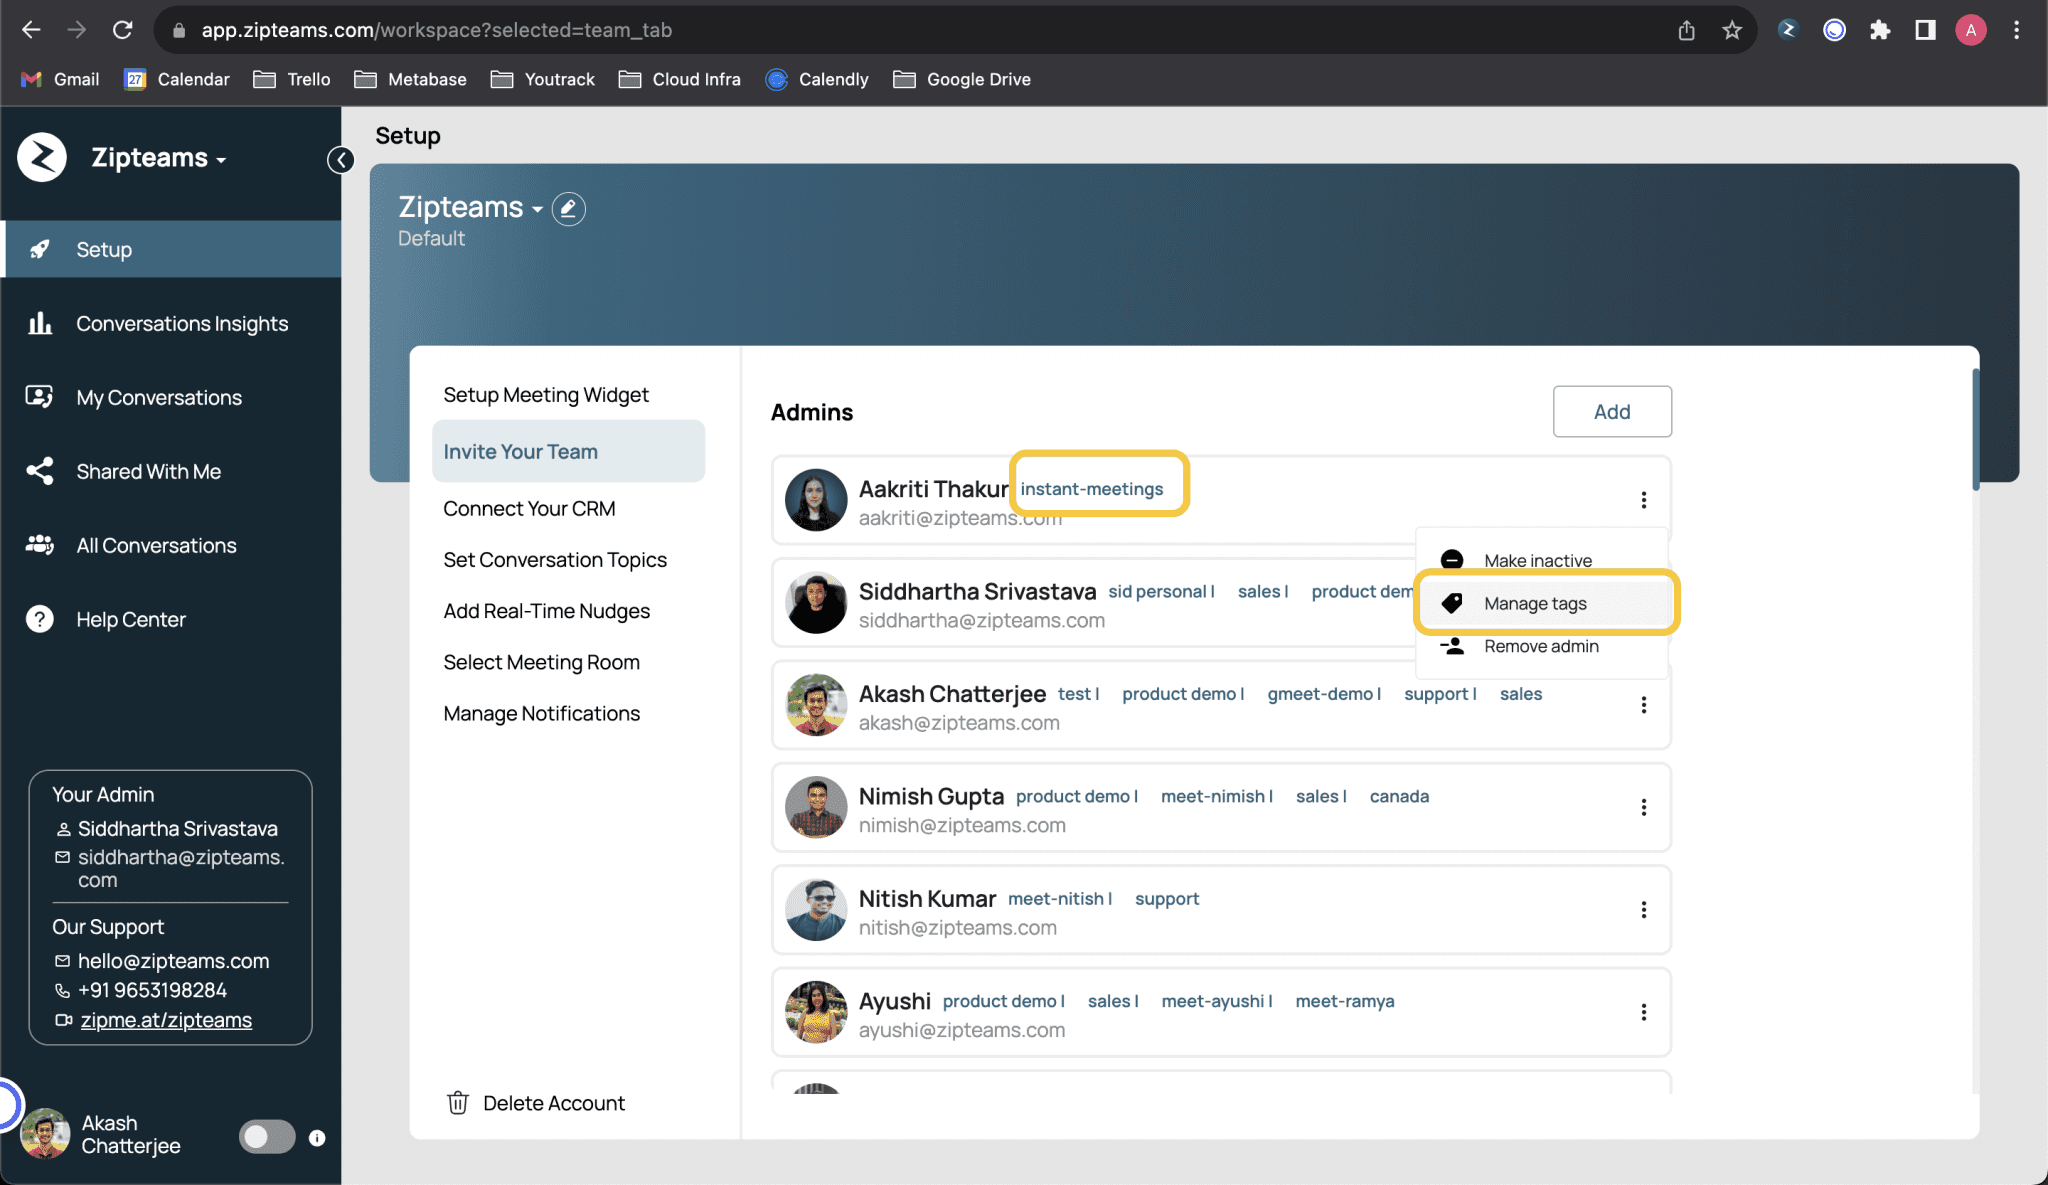
“Invite Your Team”
. Ensure that the relevant members of your team, who will be active for instant video meetings, have the required tag (refer point 4).

You can use this screen to make changes to the tags or invite new members to join your Zipteams workspace.

7Go ahead and
activate your toggle
, so that you’re available for Instant Meeting requests. In case this toggle (and that of all other members who are tagged) is off, then the widget defaults to a Calendar Slot Booking view.
8When a new meeting invite comes from a prospect (after you set up GTM in the next section), the allocated salesperson shall get the notification on the

Zipteams Dashboard
.
To not miss any request, you can also install our
Chrome Extension
, enabling you to toggle your availability and receive instant meeting notifications across any window.

Set up Google Tag Manager
1Open your Google Tag Manager dashboard and navigate to the
“Tags”
section and click on
“New”
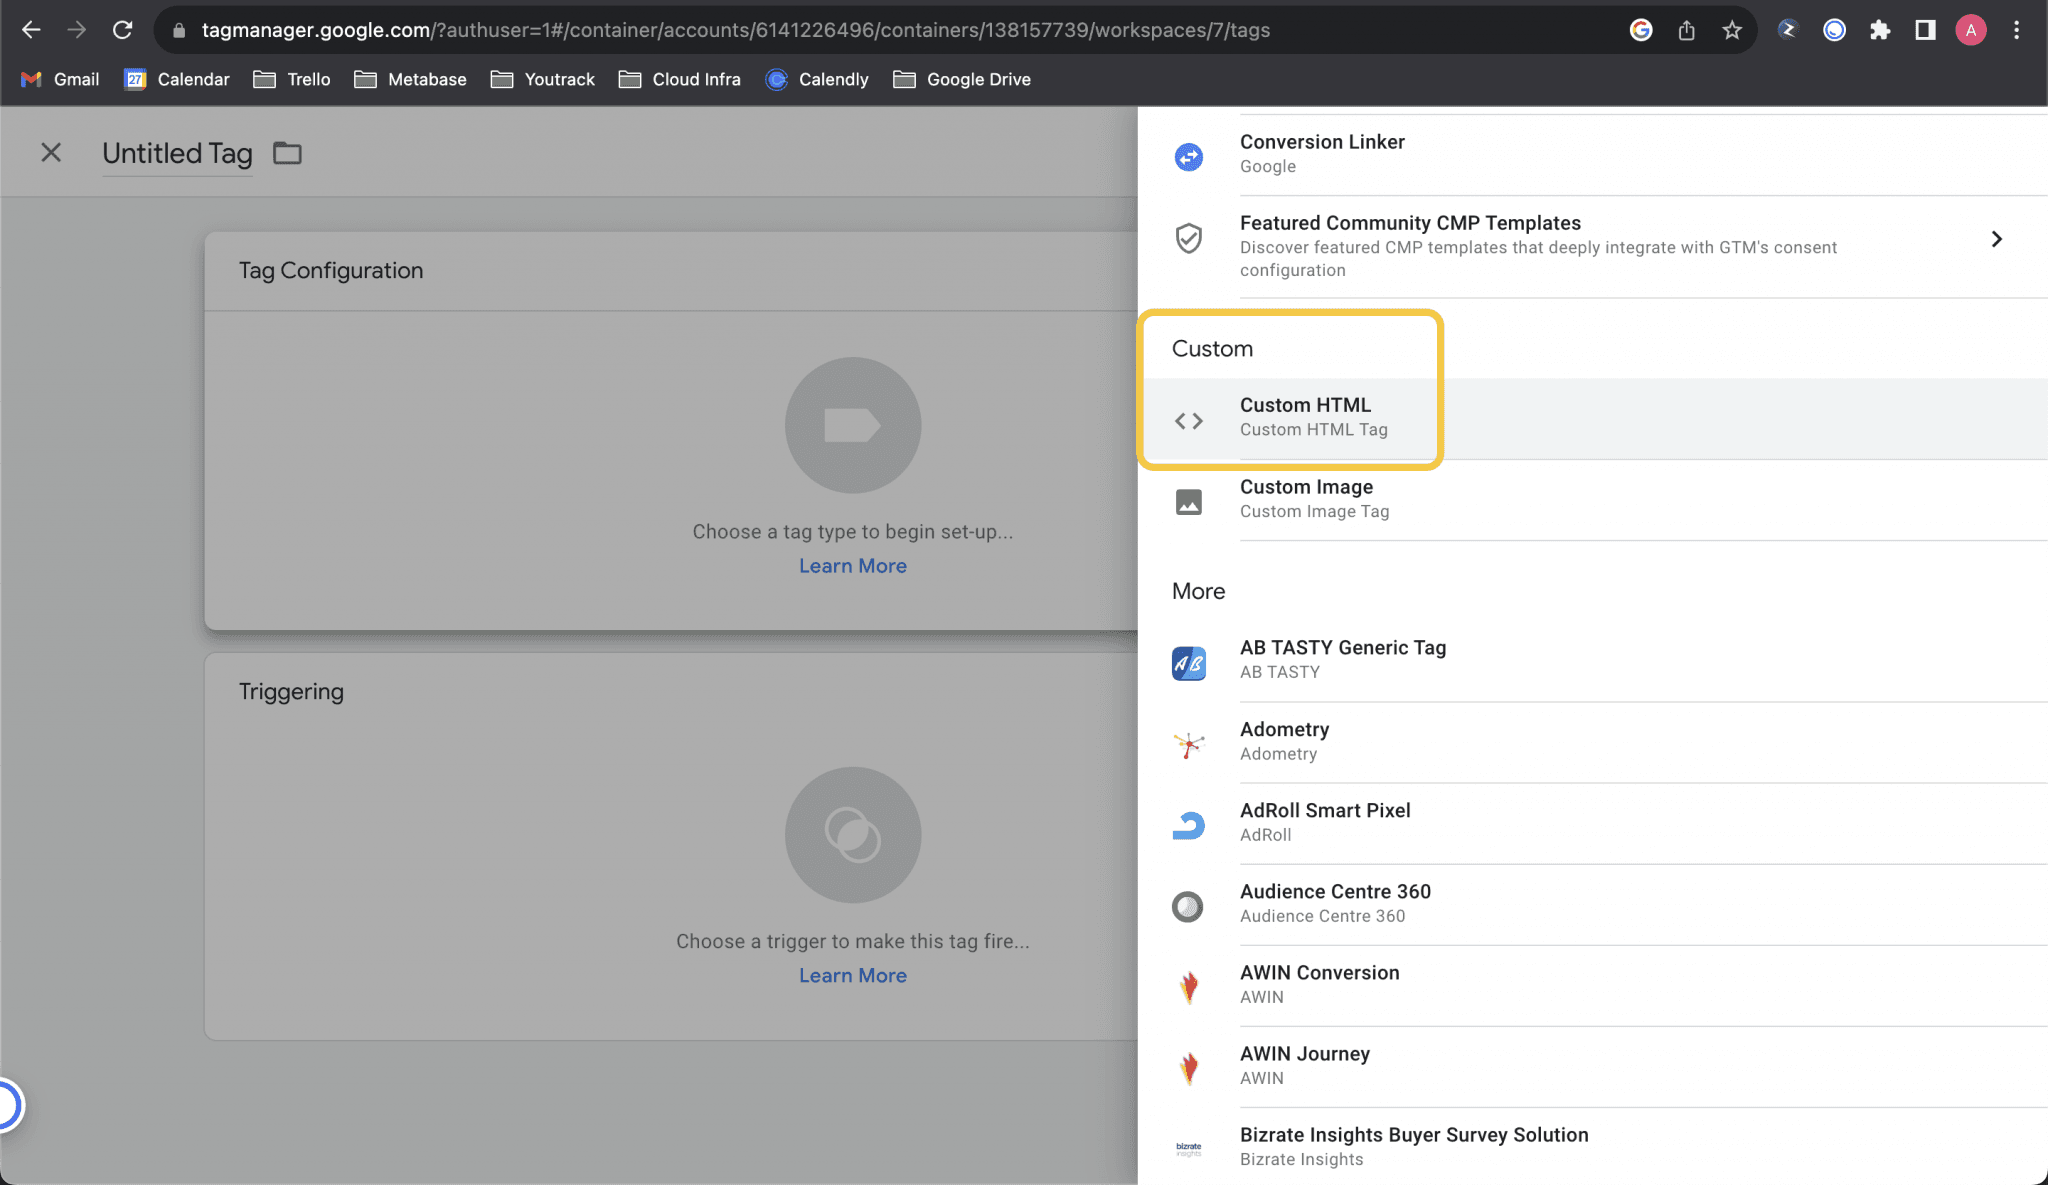
.2. Under
“Tag Configuration”
, create a new
“Custom HTML Tag”
3Paste the following code in your tag.
IMPORTANT
:
Ensure you replace
ZIPTEAMS_MEETING_URL
in the code below as per the URL noted in step 5 of your Zipteams setup.
Also, Based on how you want the widget to show up on your screen, you have 2 options.

Option 1

Load as a centre-screen popup. This is great for maximum attention capture!
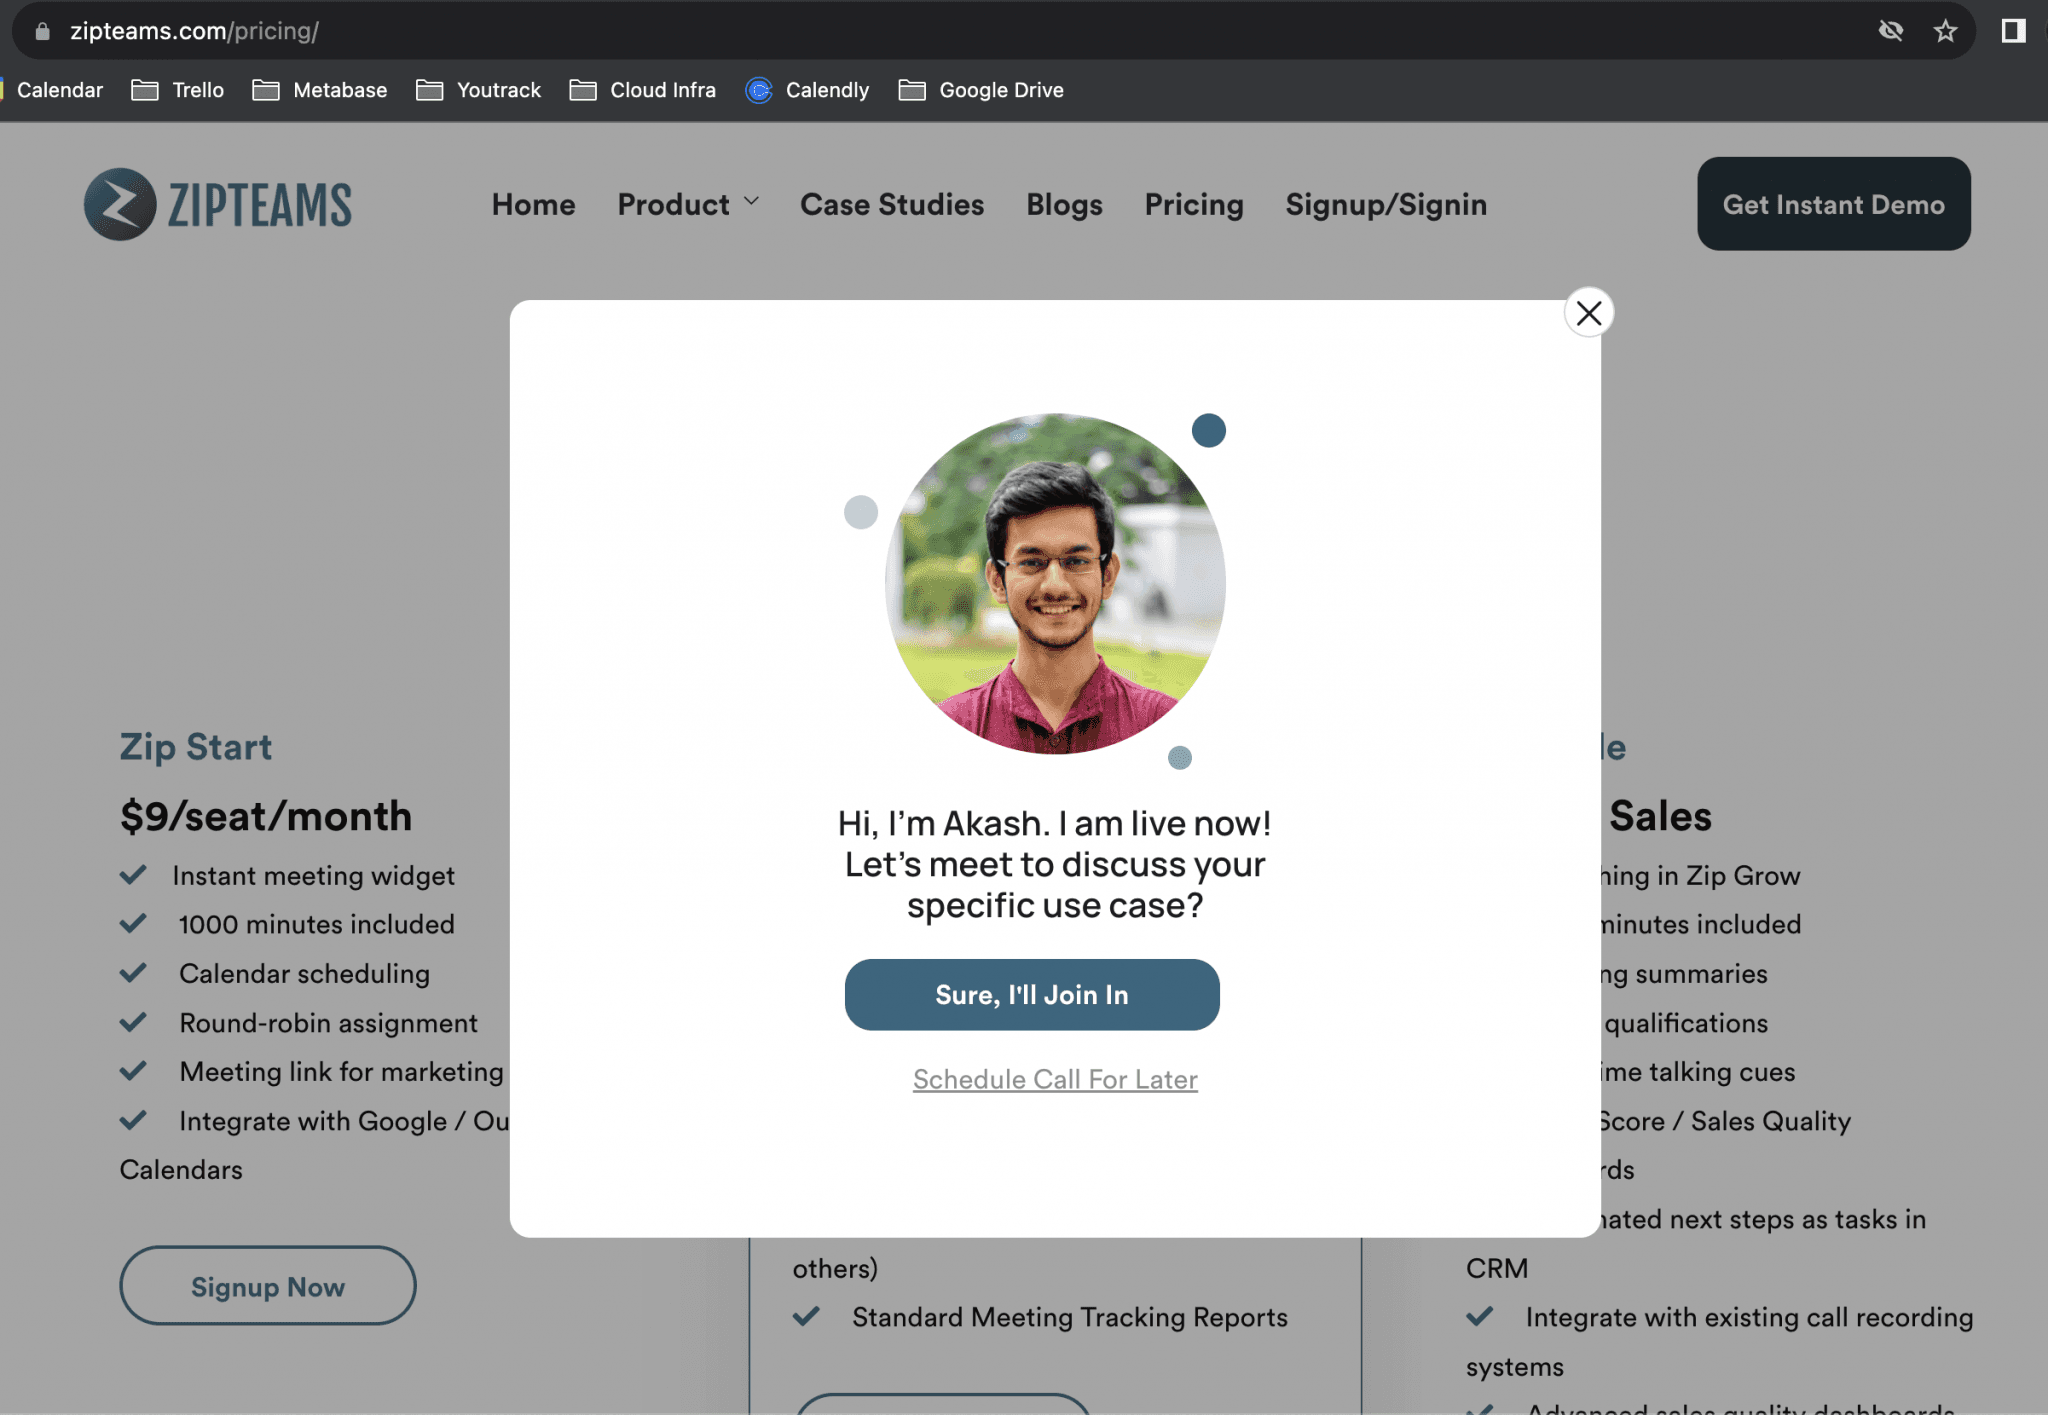
For Option 1, use
DISPLAY_TYPE
as
InitFullFrame
in the code snippet given below.
Option 2
Load as a floating icon on the corner of a web page. Use this when you want the widget load to be subtle.
You can control the location from
“Widget Control”
in your Zipteams setup.
For Option 2, use
DISPLAY_TYPE
as
InitWidgetButton
in the code snippet given below.
<
link
href
=
rel
=
"stylesheet"
/>
<
script
type
=
"text/javascript"
>
(
function
(
)
{
var
script
=
document
.
createElement
(
'script'
)
;
script
.
type
=
'text/javascript'
;
script
.
id
=
'zt-script-loader'
;
script
.
async
=
true
;
script
.
src
=
;
prefillObj
=
{
}
/* Uncomment to activate code to prefill form values (form trigger) prefillObj["<ZIPTEAMS FORM LABEL 1>"] = <DATA_LAYER_VARIABLE> prefillObj["<ZIPTEAMS FORM LABEL 2>"] = <DATA_LAYER_VARIABLE> */
script
.
onload
=
function
(
)
{
window
.
ZipteamsWidget
.
DISPLAY_TYPE
(
{
url
:
'ZIPTEAMS_MEETING_URL'
,
prefill
:
prefillObj
}
)
;
}
;
script
.
onerror
=
function
(
)
{
console
.
error
(
'Failed to load the Zipteams script.'
)
;
}
;
document
.
body
.
appendChild
(
script
)
;
}
)
(
)
;
<
4.
Set up your triggers
when you want the tag to be fired.
One useful trigger could be inviting prospects for an instant conversation when they spend more than 20 seconds on the pricing page. Here’s how you can set up this trigger.
5Once you
save the tag with the necessary triggers
, your GTM setup should look something like this.
6.
That’s it!
You’re all set to engage your customer instantly on your website and convert more high-intent leads to demos.